Configuring UpdateWarranty for On-Premise ConnectWise
UpdateWarranty can update warranty information by either using the ConnectWise API integration or by direct database access. The
ConnectWise direct database acces method allows UpdateWarranty to populate both the warranty expiration and purchase date fields.
If you are a ConnectWise On-Premise user you can use the direct database access method explained below.
Prerequisites
- You have access to your ConnectWise database server.
- You have workstation and server configurations with the Serial Number or Tag Number fields populated.
- You have Java 6 Update 27 or Java 7 installed (Warning: Java 6 Update 29 is not compatible with SQL Server 2008).
1. Create a SQL Account for UpdateWarranty
- A. Log or Remote Desktop into your ConnectWise Database Server.
- If you have
separate server instance for Database and Web services ensure you are using the
Database server. You need to log into the Windows Server environment that runs ConnectWise,
not log into the ConnectWise application.
- B. Launch SQL Server Management Studio
-

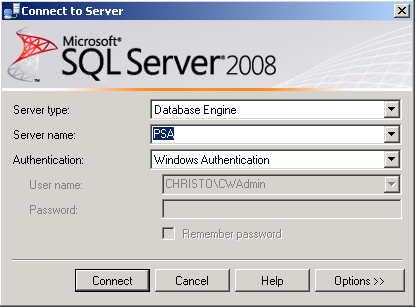
- C. Login into SQL Server
-
- Typically, the login credentials will already be configured for your SQL Server instance
and you can click "Connect" to continue to the next step. Otherwise,
the Server name should be set to the hostname of your database server or set to LOCALHOST.
Authentication should be set to "Windows Authentication". If Windows Authentication fails, log out
and log back into the ConnectWise Server using the CWAdmin account.
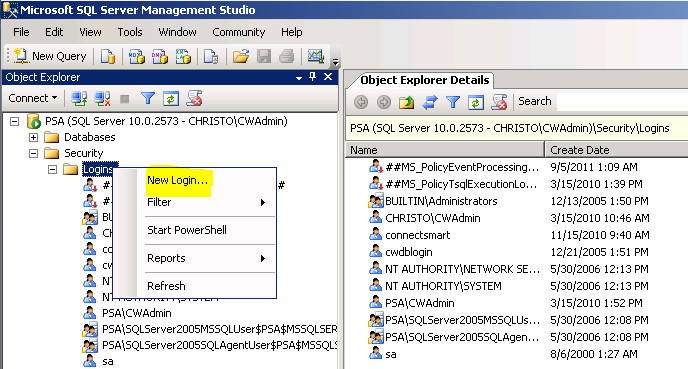
- D. Launch the New Login Wizard
-
- Expand the Security tree in the left-side navigation window. Right-click the Logins
folder under Security and select "New Login..."
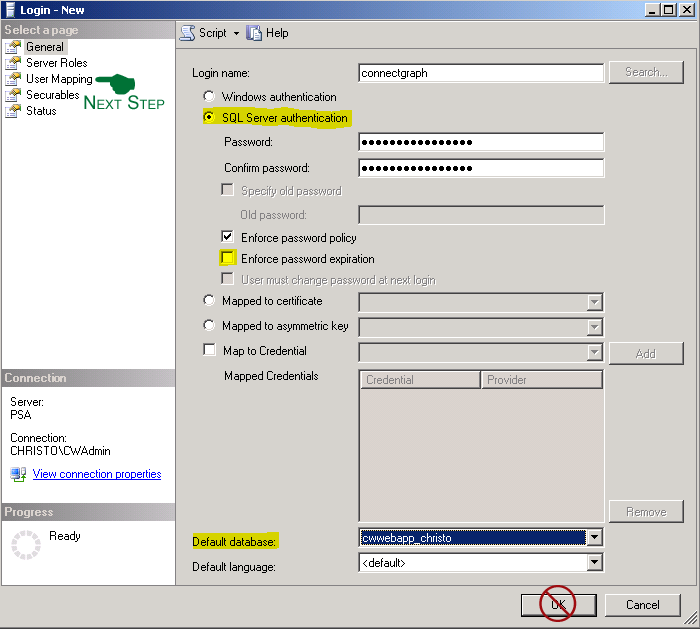
- E. Create a ConnectGraph SQL Account(Do not click OK until the next step)
-
- Enter the Login name as "connectgraph". Ensure you select
SQL Server authentication and enter a password. You will need this password for a later step
and it is essential to record the correct password. Uncheck Enforce password expiration and change the
Default database to your ConnectWise instance. If your CW Company Name is "Costco" then you would select
"cwwebapp_costco" from the Default database drop-down list.
- F. Set Permissions for ConnectGraph Account
-
- Select User Mapping in the left-side navigation window. Check your ConnectWise
database instance and check db_datawriter and db_datareader. Click OK to create the
ConnectGraph account.

- You have completed Step 1 and may close SQL Server Management Studio.
Step 2: Launch the UpdateWarranty Client
- A. Open the UpdateWarranty Website
- Open a web browser to http://www.updatewarranty.com/. If you have
already purchased UpdateWarranty you can log into the site; otherwise, use the Evaluation version. Launch the UpdateWarranty client via the
website's Launch button.
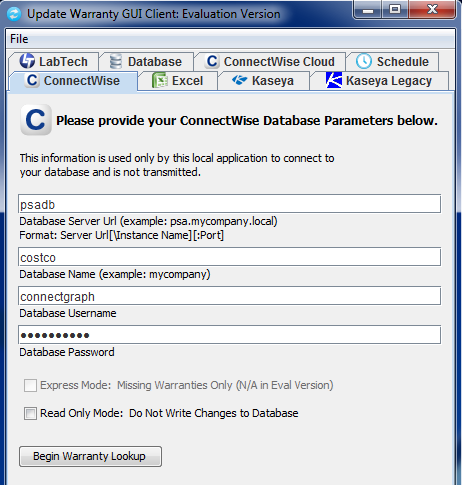
- B. Populate Fields for ConnectWise Settings
- Click on the ConnectWise tab and begin populating the required fields. The Database Server Url field should correspond
to the name of the server you remoted in for Step 1A. If you are using Microsoft SQL Express you will need to include the Instance Name.
The Database Name field should correspond to the Company ID value you use when logging into the ConnectWise client.
The Database Username and Database Password were created during Step 1E. After you have filled in all the fields, click on the Begin Warranty Lookup button.