UpdateWarranty for Autotask
Use UpdateWarranty to update your workstation and server Configuration Items' installed and warranty expiration dates in Autotask.
Instructions are provided below for launching the evaluation version, the full version and scheduling the UpdateWarranty process.
Prerequisites
- A valid username and password for Autotask with rights to read/update Configuration Items.
- Configuration Items created in Autotask for workstation and servers with at least the Serial Number field populated.
- Java 6 or higher installed.
- Access to the Internet.
- A. Open a web browser to http://www.updatewarranty.com/ and click on UpdateWarranty.
- B. Click on the Launch Evaluation Version Button
-

- C. Select the Autotask tab
-
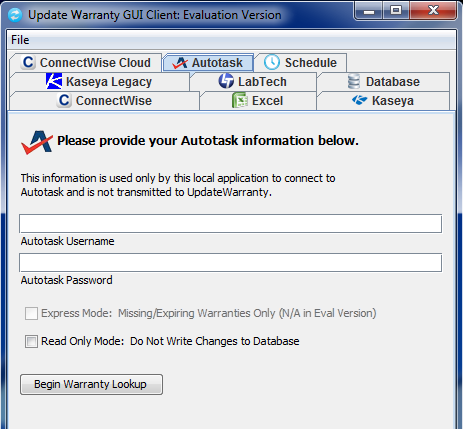
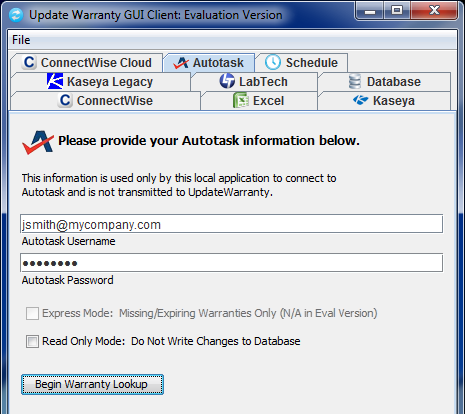
- D. Fill-in Form and click on Begin Warranty Lookup
-
- Enter your username and password for Autotask and click on the Begin Warranty Lookup button.
- E. UpdateWarranty will update the first 20 Entries
-
- UpdateWarranty will then display all the Configuration Items containing serial numbers and begin populating the installed date
and warranty expiration date. The Evaluation Version will only perform lookups on the first 20-100 configuration items.

- A. Open a web browser to http://www.updatewarranty.com/ and click on UpdateWarranty.
- B. If you haven't purchased UpdateWarranty, click on the Purchase at the top of the page.
- When you purchase UpdateWarranty you will need to select what size (how many devices) package to buy. After clicking on the
Begin Warranty Lookup button in the Evaluation Version, a dialog box will appear indicating how many Configuration Items were discovered.
Once purchased, you will be emailed an activation link to create a username and password for the UpdateWarranty website.
- C. Log into the UpdateWarranty website
- Click on the Sign-in link at the top of the UpdateWarranty website and login using the username and password created
after you purchased the product. A link is provided to reset your password if forgotten.
- D. Click on the Launch UpdateWarranty Button
- The Launch UpdateWarranty button will also include your subscription expiration date below it.

- E. Select the Autotask tab
-
- F. Fill-in Form and click on Begin Warranty Lookup
-
- Enter your username and password for Autotask and click on the Begin Warranty Lookup button.
- G. UpdateWarranty will Process lookups for all your Configuration Items
-
- UpdateWarranty will then display all the Configuration Items containing serial numbers and begin populating the installed date
and warranty expiration date. The Full Version will attempt lookups for all your configuration items.
- A. Open a web browser to http://www.updatewarranty.com/ and click on UpdateWarranty.
- You should launch the browser window and the UpdateWarranty Java Application from the machine you wish to schedule the UpdateWarranty process.
- B. If you haven't purchased UpdateWarranty, click on the Purchase at the top of the page.
- When you purchase UpdateWarranty you will need to select what size (how many devices) package to buy. After clicking on the
Begin Warranty Lookup button in the Evaluation Version, a dialog box will appear indicating how many Configuration Items were discovered.
Once purchased, you will be emailed an activation link to create a username and password for the UpdateWarranty website.
- C. Log into the UpdateWarranty website
- Click on the Sign-in link at the top of the UpdateWarranty website and login using the username and password created
after you purchased the product. A link is provided to reset your password if forgotten.
- D. Click on the Launch UpdateWarranty Button
- The Launch UpdateWarranty button will also include your subscription expiration date below it.
- E. Select the Autotask tab
-
- F. Fill-in Form
-
- Enter your username and password for Autotask. If you wish to update an RMM tool as well, switch to your RMM tab and fill-in
the RMM form fields as well.
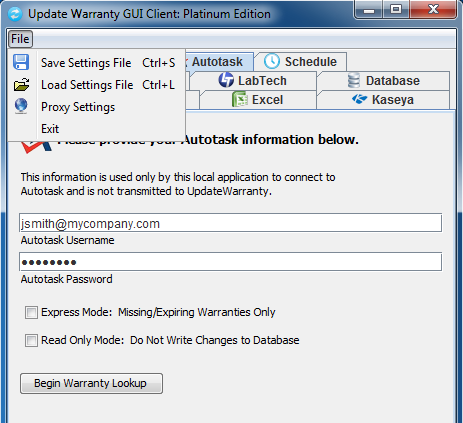
- G. Save your Connection Setting to an XML File
-
- After you have filled in the form, select File from the UpdateWarranty application Menu and choose Save Settings File.
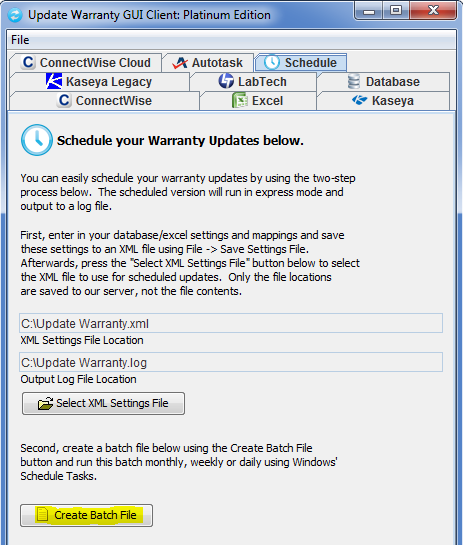
- H. Select the Schedule tab
-
- The Schedule tab should already display the XML Setting File location already. If not, you may click on the
Select XML Settings File button to specify the location of your XML settings file.
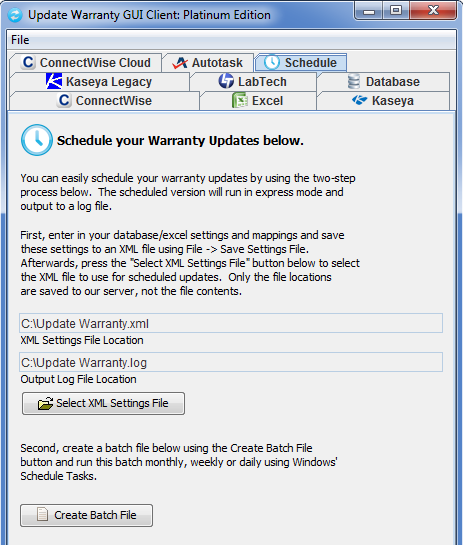
- I. Click on the Create Batch File Button
-
- Click on the Create Batch File button and select a location to save your batch file.
- J. Schedule Task
-
- Use the Windows Scheduled Tasks to create a scheduled task to execute the batch file daily. Please note that first time the batch file
is run as a user you will be asked to accept the certificate. If you choose to run the scheduled batch file as a different user you must first
login as that user, run the batch file manually and accept the certificate.